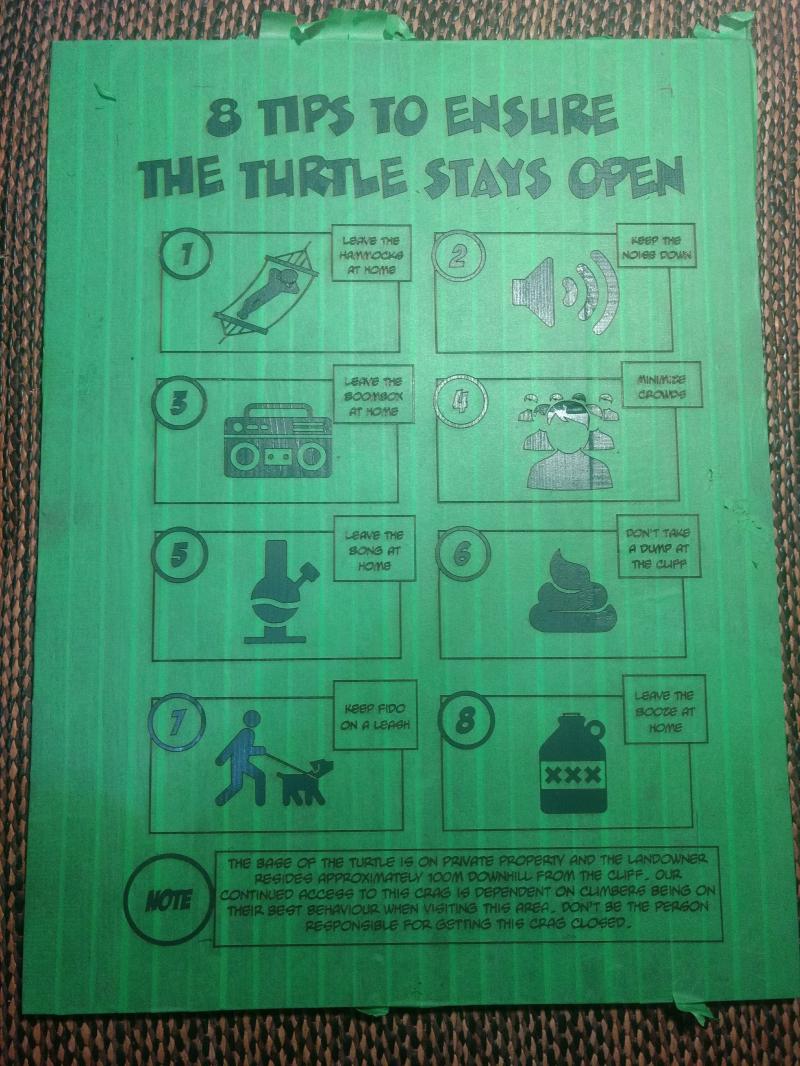
The Greater Toronto Area has a boatload of people and very very few nearby rock climbing areas. So when a few local climbers developed The Turtle, a new crag on private land, there was certain to be heavy use and a high risk of a pissed-off land owner closing the crag. Developer Gus Alexandropoulos thought a couple signs around the crag would do nicely to encourage good behavior, so in the name of good crag karma I offered to make them.
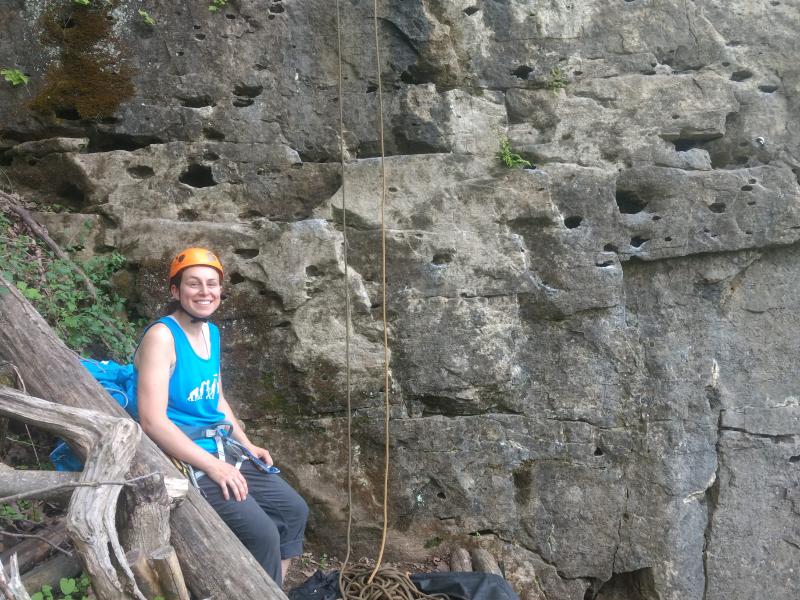
Anne at the Turtle, happy after her first outdoor lead!
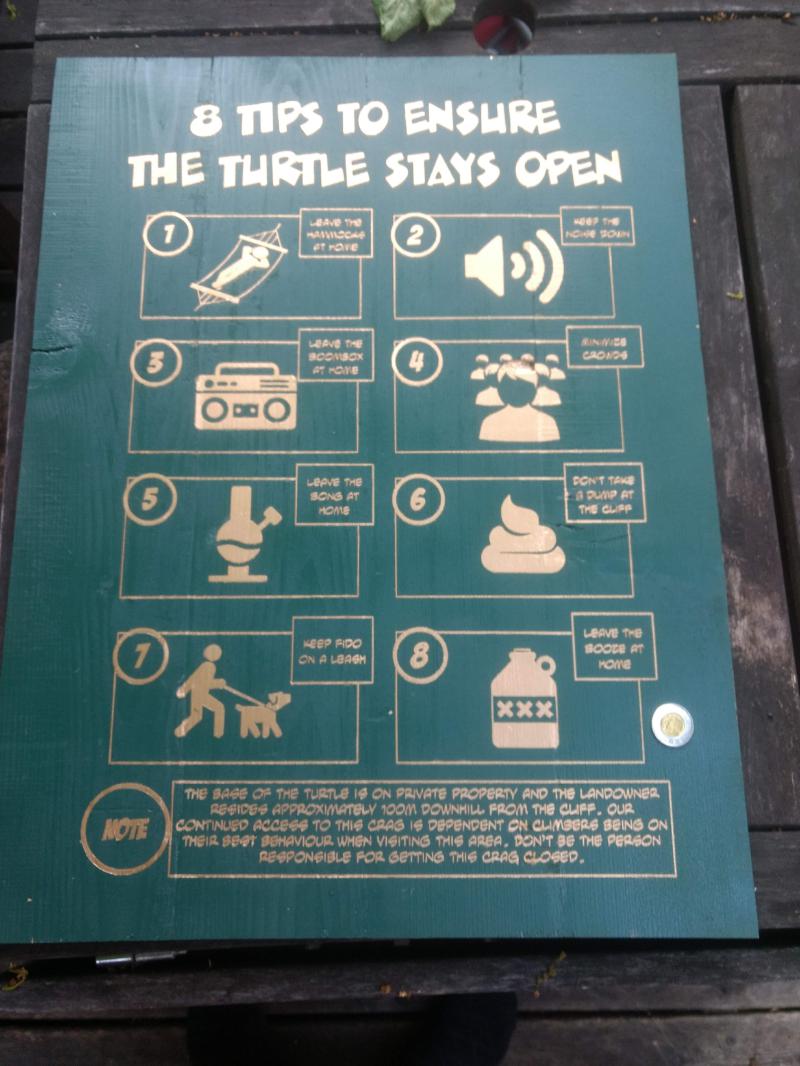
Gus wanted two signs, one to indicate the end of the crag (the landowner’s house was just beyond the cliff) and a larger sign offering suggestions for best practices at the cliff. I started on the big one first.
The bed of the laser cutter supports pieces up to 26"x20" (the actual cutting area is smaller), so I started by making a cedar panel around that size. I chose cedar because I had a few boards left over to consume and because it’s supposed to be a good wood for outdoor use, rot resistant.
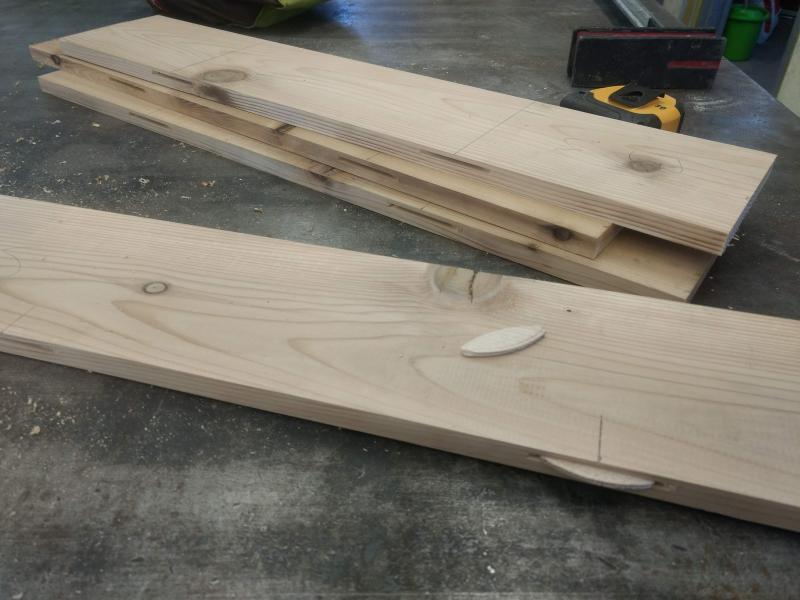
Four cedar boards jointed, planed, trimmed on the table saw and slots cut on the biscuit jointer. Ready for glue up
I used a biscuit jointer for the first time on these panels, motivated by less-than-flat panels that came out from my butt joints in the pentagon project. The tool turned out to be trivially easy to use and gave really nice results. I’ll definitely use it again.
I toyed with the idea of leaving a natural wood surface, finished with varnish or danish oil, but read that after a few winters the finish would weather and start to look chalky. So instead I painted the backboard green.
The key tool enabling this job is Site 3’s laser cutter. Gus gave me a high-res black and white jpg showing what he wanted on the sign - I used Inkscape to turn that into a vector image and exported a .dxf of all the edges in the image, which is what you need to feed into the laser. So after four coats of paint I masked the entire panel with painter’s tape put it in the laser to cut the pattern out of the mask. For what it’s worth I used Speed = 25 and Power = 20 for the job. It was more than enough power to make it through the masking tape, which is all I wanted. The laser job took just under half an hour.
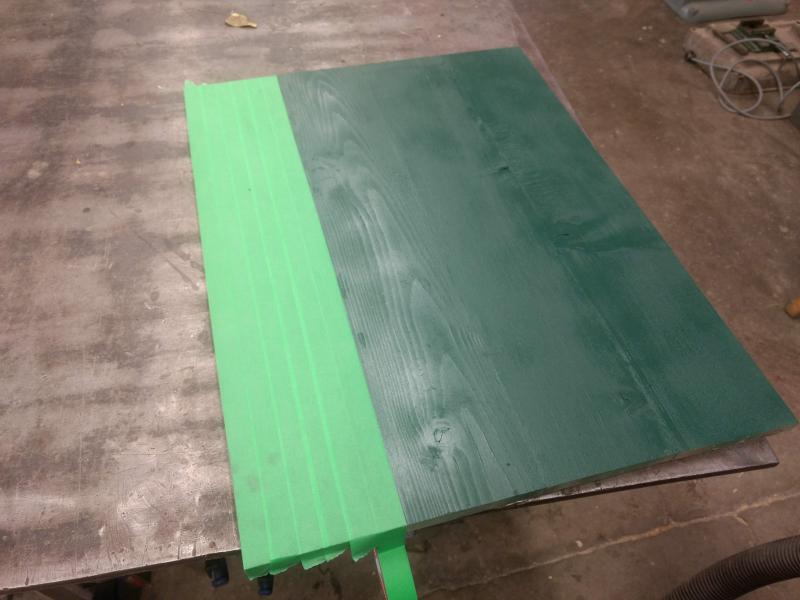
The painted panel getting ready for a date with the laser cutter
After cutting came the somewhat tedious task of plucking out all the bits of tape that covered the positive space I wanted spraypainted. This took a backyard beer and half an hour.
The masked sign, post lasering and plucking, ready for paint. An ugly knot in box #4 made for poor tape adhesion, but the lines still turned out fairly crisp
I was concerned about getting a good seal between the tape and wood, especially since some of the text was quite small and the painter’s tape I used was cheap. So before painting I ran my thumb over all the detail areas, pushing down hard as I worked across the surface. The paint job needed a little cleaning up, especially along lines that ran across the wood grain, but overall the finish wasn’t too bad.
The sign after 2 coats of gold paint. Ivy league color scheme :)
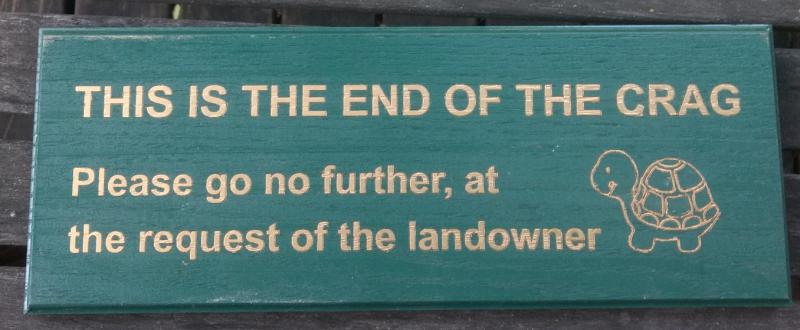
The landowner's backyard was just beyond the point where the cliff tapered out, so we don't want people poking around
The small sign was made from a piece of scrap oak, and the text came out much better than on the cedar. I think the tighter grain made for a smoother top surface, leaving fewer gaps between the wood and tape for paint to sneak through. Or maybe it was just the larger font size that helped.
Once both signs were finished Anne and I buzzed out to the crag after work to meet up with Gus and his buddy Mike to get the signs installed. Gus, being a route developer, had a giant-ass hammer drill and hardware for mounting the sign directly into the cliff. Using 3 half-inch bolts to hold up a couple boards of cedar is definitely overkill, but it’s what he happened to have on hand. At least it’s not going anywhere!
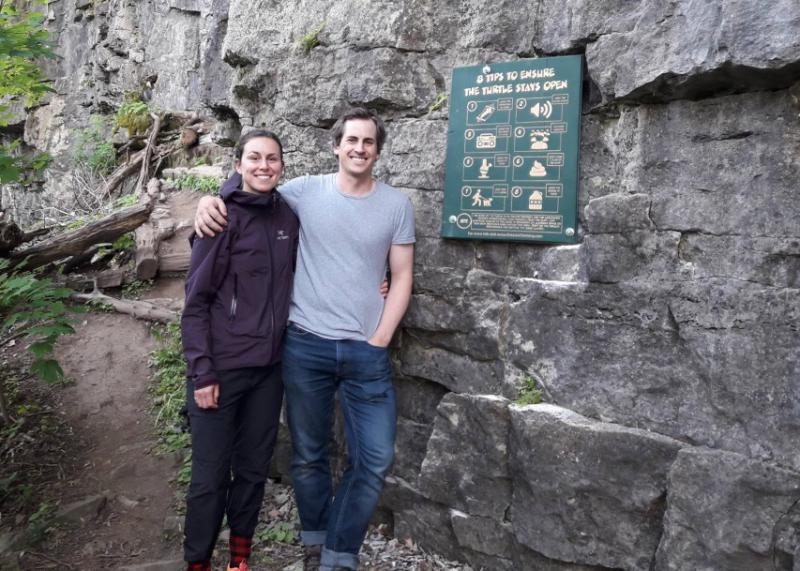
Done and installed!
BOM:
- 4 board feet of wood (ply would work nicely as a substitute)
- 2 colors of spraypaint, preferably the outdoors kind
- Half a roll of masking tape
Total cost ~$30, less if you assign some value to the leftover paint. Not bad for a custom sign job that you can knock out in a day.